No one believes these are not brand-new doors, but the ones dating back to the 1️⃣9️⃣7️⃣0️⃣s! 🫢🤯 How? 🧐🚪 A man named Alexander took on a challenge and transformed decades-old doors beyond recognition! 👏🧑🔧 The forgotten items of the past have become stunning pieces of furniture! 💯😍 You had better sit down before I show the final results in this article! 👇
When it comes to old doors, most people assume replacing them is the only option. But an old man named Alexander took on an extraordinary challenge—transforming decades-old doors into something so flawless that you’d never guess they weren’t brand new.

From him:
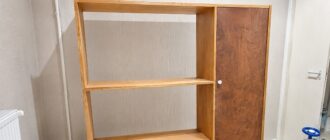
Wishing everyone good health and good vibes! These doors were over 50 years old when I started working on them—just your standard interior doors, the kind that can still be found in forgotten corners of old buildings. The owners had searched for similar replacements but couldn’t find an exact match. Ordering custom-made ones proved impossible, so they kept the doors, just in case. Eventually, someone suggested a different approach: restoration.

The entire process took just under a month, but it wasn’t as simple as sanding and repainting. The door frames had to be dismantled—just as you would with newly manufactured doors. And here’s why: when restoring old doors, you need wood from the same era to ensure a seamless repair, and the only reliable source is the original frame itself. So, removing the frame “gently” became a crucial first step. I never take on projects where people refuse to remove the frame—it’s a dealbreaker for me because it compromises the entire restoration.

The Transformation Process
A brand-new frame was built from five layers of glued wood, featuring carefully measured grooves for structural elements like the lock latch and hinges. Unlike mass-produced modern doors, where measurements are precise to the millimeter, I left slight tolerances to prevent mechanical friction. Grooves for door extensions were also a must—older frames weren’t designed for them, but they help prevent future issues like moisture damage that could lead to additional plastering and painting.


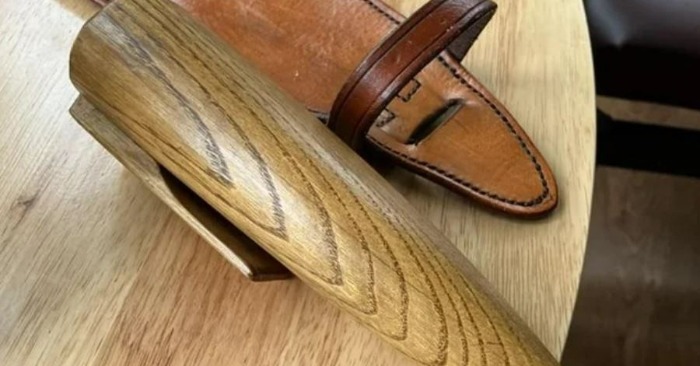
Once in the workshop, the real work began—similar to furniture restoration. Layers of old paint were stripped away, dents and cracks were patched, and endless rounds of sanding ensured a flawless surface. This was also the time to rethink certain design aspects. The original glass bars were removed, making way for a sleek, full-glass panel. The outdated molding was discarded and replaced with two layers of bonded organolith, which served as a sturdy foundation for the final decorative layer.
For those unfamiliar, organolith is a composite material commonly found in laminate flooring. It’s resistant to temperature changes, moisture, and warping—basically, a perfect solution for interior doors. To test its durability, I left a sample exposed to harsh weather conditions before measuring it again in good weather—no changes at all. This confirmed that it was an excellent choice.


The door panels were reinforced with metal studs running through the top and bottom bars for added stability. Once the structure was complete, the doors were fitted back into place, left unpainted for a final round of adjustments. Any minor imperfections were sanded out, the door frame was securely fastened into the floor, and the finishing details—like extensions and cornice measurements—were finalized before everything was taken back for painting.

The Finishing Touch
Once painted, there should be no need for chisels, drills, or grinders—only a screwdriver for final assembly, and that’s it! The doors were finished with NTs-based enamel and reactive lacquer, which was tinted with a coffee-colored finish. In total, about 10 liters of paint and lacquer were used. Even the reverse sides of the panels and frame edges were coated to prevent future moisture absorption.

For those curious, the reactive lacquer used here is a two-component formula that hardens through an acid reaction rather than air exposure. It’s designed for interior furniture, offering a smooth, self-leveling finish without the risk of drips. It also resists UV yellowing, though prolonged exposure to moisture can leave marks. However, it should never be mixed with certain varnish types, as it can cause chemical reactions leading to surface corrosion—except when used with polyurethane or NTs-based finishes.

I check in on these doors twice a year, and each time, I remember how they looked before. The transformation is unbelievable—what was once an old, forgotten piece of the past has become a stunning feature of the home. Seeing these doors now, I hope they inspire others to give their aging doors a second chance.
Let’s take a look at the final result—absolutely flawless! It’s hard to believe it’s the same door!